
Simple Android Application that makes use of Database
To develop a Simple Android Application that makes use of Database.
Procedure:
Creating a New project:
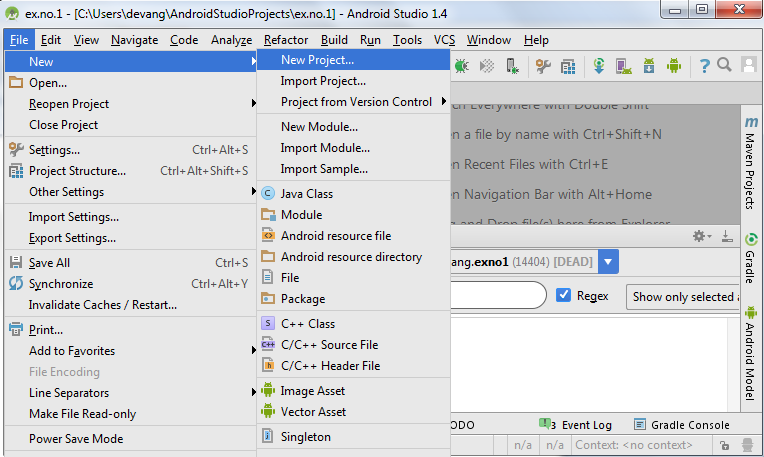
- Open Android Studio and then click on File -> New -> New project.
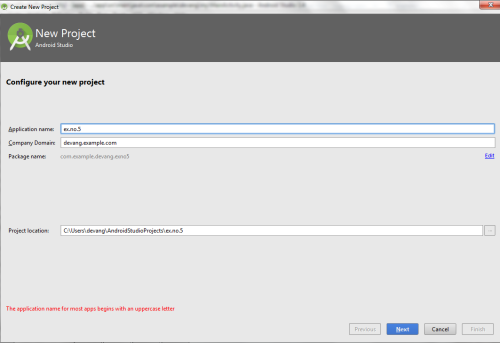
- Then type the Application name as “ex.no.5″ and click Next.
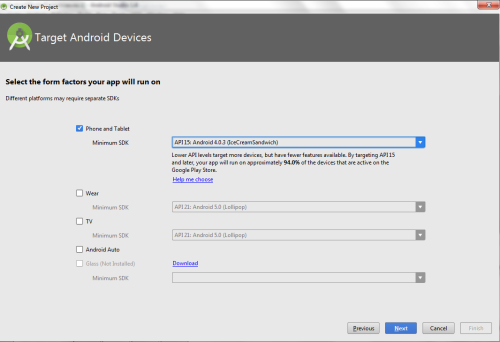
- Then select the Minimum SDK as shown below and click Next.
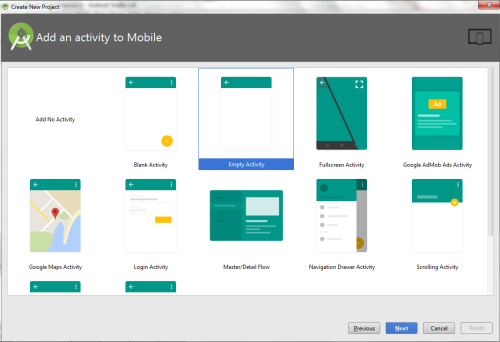
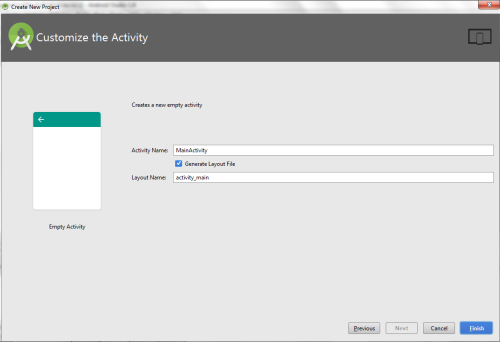
- Then select the Empty Activity and click Next.
- Finally click Finish.
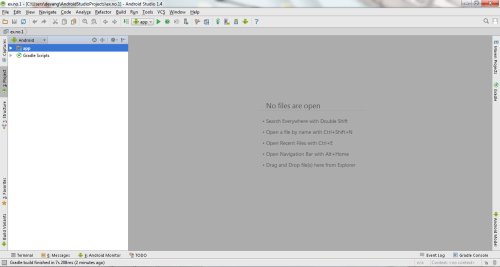
- It will take some time to build and load the project.
- After completion it will look as given below.
Designing layout for the Android Application:
- Click on app -> res -> layout -> activity_main.xml.
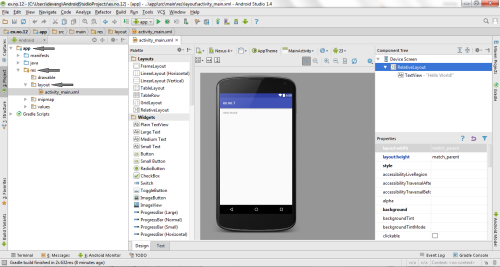
- Now click on Text as shown below.
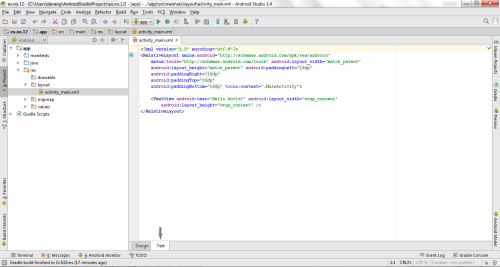
- Then delete the code which is there and type the code as given below.
Code for Activity_main.xml:
<?xml version="1.0" encoding="utf-8"?><AbsoluteLayout xmlns:android="http://schemas.android.com/apk/res/android" android:layout_width="match_parent" android:layout_height="match_parent"> <TextView android:layout_width="wrap_content" android:layout_height="wrap_content" android:layout_x="50dp" android:layout_y="20dp" android:text="Student Details" android:textSize="30sp" /> <TextView android:layout_width="wrap_content" android:layout_height="wrap_content" android:layout_x="20dp" android:layout_y="110dp" android:text="Enter Rollno:" android:textSize="20sp" /> <EditText android:id="@+id/Rollno" android:layout_width="150dp" android:layout_height="wrap_content" android:layout_x="175dp" android:layout_y="100dp" android:inputType="number" android:textSize="20sp" /> <TextView android:layout_width="wrap_content" android:layout_height="wrap_content" android:layout_x="20dp" android:layout_y="160dp" android:text="Enter Name:" android:textSize="20sp" /> <EditText android:id="@+id/Name" android:layout_width="150dp" android:layout_height="wrap_content" android:layout_x="175dp" android:layout_y="150dp" android:inputType="text" android:textSize="20sp" /> <TextView android:layout_width="wrap_content" android:layout_height="wrap_content" android:layout_x="20dp" android:layout_y="210dp" android:text="Enter Marks:" android:textSize="20sp" /> <EditText android:id="@+id/Marks" android:layout_width="150dp" android:layout_height="wrap_content" android:layout_x="175dp" android:layout_y="200dp" android:inputType="number" android:textSize="20sp" /> <Button android:id="@+id/Insert" android:layout_width="150dp" android:layout_height="wrap_content" android:layout_x="25dp" android:layout_y="300dp" android:text="Insert" android:textSize="30dp" /> <Button android:id="@+id/Delete" android:layout_width="150dp" android:layout_height="wrap_content" android:layout_x="200dp" android:layout_y="300dp" android:text="Delete" android:textSize="30dp" /> <Button android:id="@+id/Update" android:layout_width="150dp" android:layout_height="wrap_content" android:layout_x="25dp" android:layout_y="400dp" android:text="Update" android:textSize="30dp" /> <Button android:id="@+id/View" android:layout_width="150dp" android:layout_height="wrap_content" android:layout_x="200dp" android:layout_y="400dp" android:text="View" android:textSize="30dp" /> <Button android:id="@+id/ViewAll" android:layout_width="200dp" android:layout_height="wrap_content" android:layout_x="100dp" android:layout_y="500dp" android:text="View All" android:textSize="30dp" /></AbsoluteLayout>
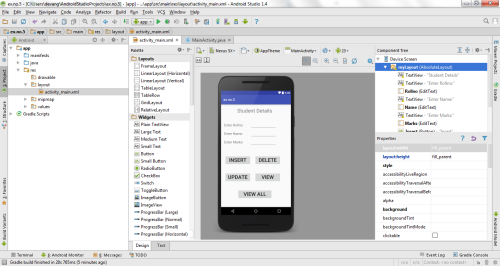
- Now click on Design and your application will look as given below.
- So now the designing part is completed.
Java Coding for the Android Application:
- Click on app -> java -> com.example.exno5 -> MainActivity.

- Then delete the code which is there and type the code as given below.
Code for MainActivity.java:
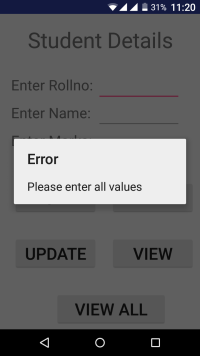
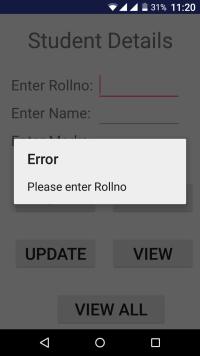
package com.example.exno5;import android.app.Activity;import android.app.AlertDialog.Builder;import android.content.Context;import android.database.Cursor;import android.database.sqlite.SQLiteDatabase;import android.os.Bundle;import android.view.View;import android.view.View.OnClickListener;import android.widget.Button;import android.widget.EditText;public class MainActivity extends Activity implements OnClickListener{ EditText Rollno,Name,Marks; Button Insert,Delete,Update,View,ViewAll; SQLiteDatabase db; /** Called when the activity is first created. */ @Override public void onCreate(Bundle savedInstanceState) { super.onCreate(savedInstanceState); setContentView(R.layout.activity_main); Rollno=(EditText)findViewById(R.id.Rollno); Name=(EditText)findViewById(R.id.Name); Marks=(EditText)findViewById(R.id.Marks); Insert=(Button)findViewById(R.id.Insert); Delete=(Button)findViewById(R.id.Delete); Update=(Button)findViewById(R.id.Update); View=(Button)findViewById(R.id.View); ViewAll=(Button)findViewById(R.id.ViewAll); Insert.setOnClickListener(this); Delete.setOnClickListener(this); Update.setOnClickListener(this); View.setOnClickListener(this); ViewAll.setOnClickListener(this); // Creating database and table db=openOrCreateDatabase("StudentDB", Context.MODE_PRIVATE, null); db.execSQL("CREATE TABLE IF NOT EXISTS student(rollno VARCHAR,name VARCHAR,marks VARCHAR);"); } public void onClick(View view) { // Inserting a record to the Student table if(view==Insert) { // Checking for empty fields if(Rollno.getText().toString().trim().length()==0|| Name.getText().toString().trim().length()==0|| Marks.getText().toString().trim().length()==0) { showMessage("Error", "Please enter all values"); return; } db.execSQL("INSERT INTO student VALUES('"+Rollno.getText()+"','"+Name.getText()+ "','"+Marks.getText()+"');"); showMessage("Success", "Record added"); clearText(); } // Deleting a record from the Student table if(view==Delete) { // Checking for empty roll number if(Rollno.getText().toString().trim().length()==0) { showMessage("Error", "Please enter Rollno"); return; } Cursor c=db.rawQuery("SELECT * FROM student WHERE rollno='"+Rollno.getText()+"'", null); if(c.moveToFirst()) { db.execSQL("DELETE FROM student WHERE rollno='"+Rollno.getText()+"'"); showMessage("Success", "Record Deleted"); } else { showMessage("Error", "Invalid Rollno"); } clearText(); } // Updating a record in the Student table if(view==Update) { // Checking for empty roll number if(Rollno.getText().toString().trim().length()==0) { showMessage("Error", "Please enter Rollno"); return; } Cursor c=db.rawQuery("SELECT * FROM student WHERE rollno='"+Rollno.getText()+"'", null); if(c.moveToFirst()) { db.execSQL("UPDATE student SET name='" + Name.getText() + "',marks='" + Marks.getText() + "' WHERE rollno='"+Rollno.getText()+"'"); showMessage("Success", "Record Modified"); } else { showMessage("Error", "Invalid Rollno"); } clearText(); } // Display a record from the Student table if(view==View) { // Checking for empty roll number if(Rollno.getText().toString().trim().length()==0) { showMessage("Error", "Please enter Rollno"); return; } Cursor c=db.rawQuery("SELECT * FROM student WHERE rollno='"+Rollno.getText()+"'", null); if(c.moveToFirst()) { Name.setText(c.getString(1)); Marks.setText(c.getString(2)); } else { showMessage("Error", "Invalid Rollno"); clearText(); } } // Displaying all the records if(view==ViewAll) { Cursor c=db.rawQuery("SELECT * FROM student", null); if(c.getCount()==0) { showMessage("Error", "No records found"); return; } StringBuffer buffer=new StringBuffer(); while(c.moveToNext()) { buffer.append("Rollno: "+c.getString(0)+"\n"); buffer.append("Name: "+c.getString(1)+"\n"); buffer.append("Marks: "+c.getString(2)+"\n\n"); } showMessage("Student Details", buffer.toString()); } } public void showMessage(String title,String message) { Builder builder=new Builder(this); builder.setCancelable(true); builder.setTitle(title); builder.setMessage(message); builder.show(); } public void clearText() { Rollno.setText(""); Name.setText(""); Marks.setText(""); Rollno.requestFocus(); }}
- So now the Coding part is also completed.
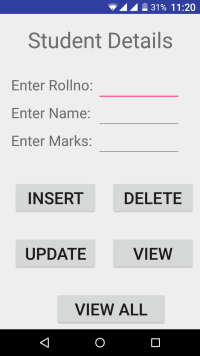
- Now run the application to see the output.
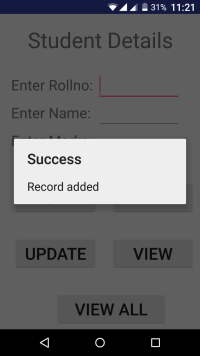
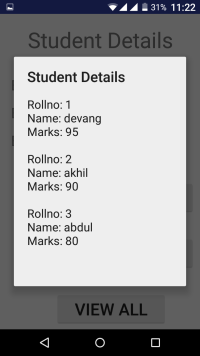
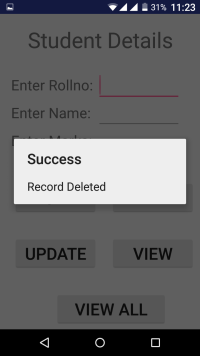
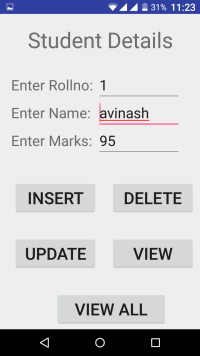
Output:


Result:
Thus a Simple Android Application that makes use of Database is developed and executed successfully.
0 comments:
Post a Comment